Disclosure: This post contains affiliate links and I may earn a small commission if you purchase through these links.
Looking after your tools for cleaning is just as important as looking after your tools for work. Vacuum cleaners get an especially large amount of use on a regular basis. I generally give my house a vacuum each day or two. With that in mind, giving your Dyson filter a clean every once in a while can really improve its performance.
How to clean your Dyson filter? It’s a pretty simple job when you get down to it. Once you’ve been doing it a while, you’ll hardly notice that you’re doing it at all. You won’t even need any product as cold water will do the job for you! Let’s take a look at keeping your vacuum cleaner in tip-top shape.
Keeping your Dyson in Good Shape
Like I mentioned above, keeping your vacuum cleaner spick and span is quite important. If you haven’t given your vacuum cleaner a clean in a while, you might start to notice bad odors and less suction.
Your vacuum cleaner may stop sucking up completely if your filter gets blocked. Obviously, this is something you want to avoid.
But it isn’t just your Dyson’s filter that you should be taking care of. Every part of your vacuum cleaner can do with a clean every once in a while.
Your Dyson will usually come with a handbook or a manual with instructions on when and how to clean it. Generally speaking, it is recommended that you clean your filter every three months.
If you do very heavy cleaning though, you’ll definitely want to clean it out a bit more than that.
While you are cleaning out your filter, why not give everything else a look too? Your Dyson has a lot of parts that can be disassembled and cleaned which will improve performance.
From the hose to the brush head, everything can and should be cleaned.
Remember! You will very rarely have to use any sort of chemical or domestic product when cleaning your Dyson. In fact, you should stay away from doing so completely. Many products can irreversibly damage your vacuum and that’s not something you should have to deal with.
Stick to using small amounts of homemade solutions, such as vinegar and baking soda. Usually, you won’t need any more than a wet cloth, a mop handle, and a bit of imagination to get your vacuum back to its old self.
Always make sure everything is dry before putting it all back together. With that out of the way, let’s take a look into cleaning your Dyson filter!

Your Dyson Filter
Your Dyson filter plays a pivotal role in keeping your house clean. Modern Dysons come with a HEPA filter, which means it is guaranteed by the US Department of Energy.
HEPA filters remove up to 99.97% of dust, pollen, mold, and all sorts of bacteria from the air. HEPA-rated filters are the very best filters that money can buy.
When you’re picking up that amount of dust from the air, it’s not surprising that you’ll have to clean it once in a while. The majority of Dyson filters are right next to the cyclone. They are usually colored purple, so you should spot them pretty easily.
Taking out your Dyson filter should be as easy as pressing a button and lifting it out. Depending on what Dyson vacuum cleaner you have, you might have more than one filter.
Certain stick vacuum cleaners have two filters. If you think that you might be missing one, you can always take a look at the handbook.
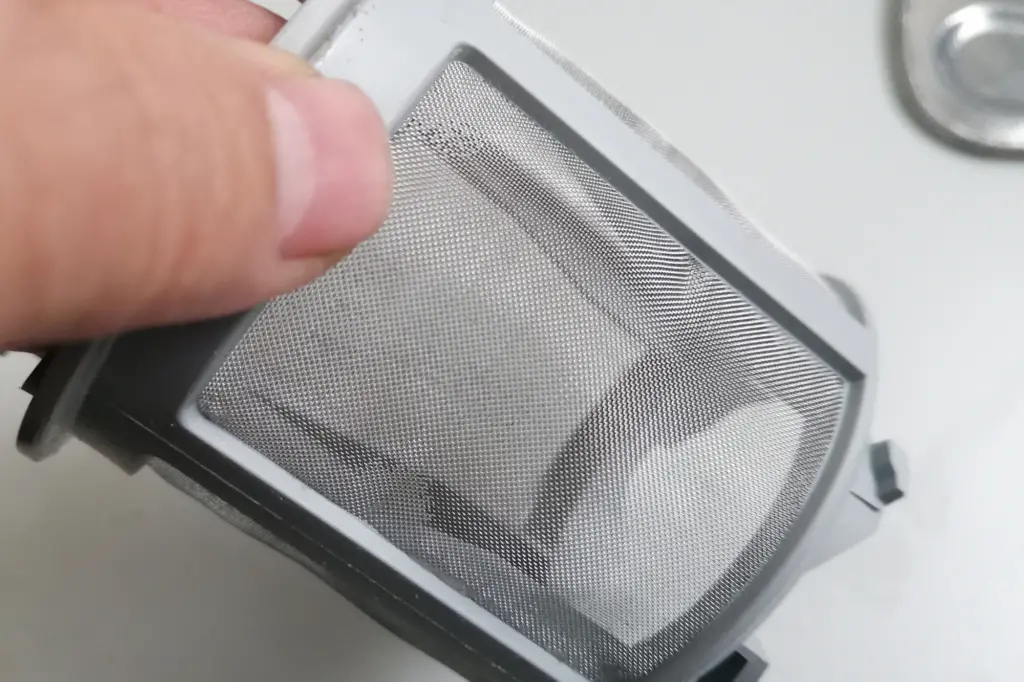
Once you have removed your filter from the vacuum cleaner, all you need to do is run it under some cold water. There is no need to use any chemicals, detergents, or cleaners.
Cold water will clean off all the dust, bacteria, and mold that might be caught up in it.
Cleaning a filter is a lot like cleaning a dirty cloth. Once you’ve wetted it, all you need to do is gently squeeze out the water.
Keep doing this until your filter looks clean, which you should be able to see pretty easily.
Don’t put your filter back in just yet, however. The filter needs to be fully dry before you can reassemble your vacuum cleaner.
I would avoid using any sort of tumble dryer on your filter, as you might end up damaging it. Simply leave the filter in a dry, warm place in your house for a few hours until you’re sure that it is dry.
Canister Filter
If you want to clean a canister filter on your Dyson, it’s just as easy as cleaning your HEPA filters.
First things first:
- Remove your Canister filter from the vacuum cleaner
- Use a dry cloth or brush to gently remove any excess dirt, wool, or debris.
- Run cold water over the canister filter to wash everything away.
- Make absolutely sure that the canister is dry before putting it back in the vacuum cleaner.
Washing any Dyson filters generally follows the same format. Whether you’re washing the filters from a Dyson fan, or just your regular vacuum cleaner.
If you are ever unsure about anything you should always make sure to read your Dyson handbook for help. While it might take a little bit of extra time to do that research, it could save you hundreds of dollars in the long run.
You do need to be careful when you’re cleaning your canister filter. The filter is often placed very close to the cyclone of the vacuum. Dyson recommends that you absolutely do not wash the cyclone with water, so you have to be extra vigilant there.
You can use an air gun, however, which uses compressed air to blast any dirt and dust out of the cyclone. This way you won’t have to use any water at all. Frankly, it’s a lot more fun to use too, so I’ll take any excuse to get it out of the box.
I hate to say it again, but make sure that the canister is dry before putting it back into the machine again. A wet canister can lead to mold and bacteria growth. Which, it seems to me, entirely defeats the point of cleaning it.

The Regular Clean
Like I mentioned earlier in the article, it is generally recommended that you clean your Dyson filters once every three months. Most people use their vacuum cleaner once or twice a week, at a minimum. I’ve been known to break out the vacuum every day of the week if I feel like the house needs it.
So if your vacuum cleaner is seeing a lot of use you should definitely be cleaning it a lot more regularly. I like to give my Dyson a clean once every month, to make sure it’s running as it should be.
There’s very little chance that you’ll be doing your machine any harm by taking it apart. So you shouldn’t be worried about doing this as much as you want. Just make sure to put it all back the right way again!
Should you replace your filters?
For the most part, this is entirely up to you. If you feel like you’re no longer getting what you would expect from your filter then you should replace it.
A very, very, broad average would be to replace your HEPA filter once every 3 to 6 months. There are lots of factors to consider.
Air pollution, heavy usage, and even humidity can affect the ability of your filter to work. It can be quite hard to tell if your HEPA filter is working less well than it used to, but you should be able to feel it.
If you’ve had a filter in any longer than 6 months, you should consider replacing it immediately. After all, what is the point of a filter that doesn’t work?
Cleaning up individual parts
One thing that you should be doing while cleaning your filter is taking a look at everything else too. Your vacuum cleaner has a lot of parts that you can detach and clean, so why not do that too?
The Vacuum Hose
The vacuum hose is something that accumulates a surprising amount of dirt. If it becomes clogged, you will notice almost straight away.
Reduced power, strange sounds, even a complete loss of function.
You can usually detach the hose from your hoover with the push of a button.
All you need to do is take a quick look down into it. Sometimes it can become quite clogged up with wool and bits of dirt. Like with everything else on your vacuum, it’s best not to use any chemicals here.
However, if you’re worried about bacteria, you can give it a quick clean with a vinegar solution. Be sure to wash it out with cold water when you’ve finished. Other than that, cleaning out your hose is very simple.
Find yourself a stick, or a mop handle, and simply push out any of the dirt that may be inside it. And you’re done.
Like always, be extra careful to dry out your hose before re-attaching it to your machine. A wet hose can cause all sorts of problems for your machine, so it is better not to risk it.
The Brush Bar
The brush bar is the thing that collects all the hair, strings, and debris from your floor. Once you’ve been using it a while, these can get all tangled up around the brush bar. This can really affect the efficiency of your vacuum cleaner.
You’ll need a few tools to get to the heart of this problem. Grab a pair of scissors and a small flathead screwdriver.
In a lot of Dyson models, you will need the screwdriver to get access to the brush bar. You might even be able to use a coin instead. So maybe give that a try first before you start rummaging around in the shed for the toolbox.
Once you have the bar brush free, you can start removing the debris. Use the scissors to untangle and cut any hair or other items that may be twisted around it.
You can use a damp cloth to clean out the back of the bar brush, a small compartment where dust might get into.
When you’ve finished that, make extra sure that it’s all dry, and then you can put it straight back in and get on with the cleaning.
The Vacuum Cleaner Itself
Something which you might forget to do is to clean the outside of the vacuum cleaner. As you might expect, the vacuum picks up a large amount of dust on its travel throughout the house.
Giving it a quick clean every once in a while will make it look great, and stop it from spreading dust around the house.
One particular spot you should clean is the vacuum cleaner wheels. These can be very bad for spreading dust and grime throughout your house. The worse part is, you could be spreading dirt onto areas that you’ve just cleaned!
A quick clean with a damp cloth, and maybe some vinegar solution, will make easy work of it.
As always, remember to let your vacuum dry before using it again.
The End
Cleaning your Dyson filters, and your other Dyson vacuum parts is an important part of keeping your house clean. The best part is that it shouldn’t take you any more than half an hour, no matter which part you want to clean.
I hope you’ve enjoyed the article, and found it helpful for keeping your machine at its very best.
Thank you for reading.
Further Reading

