Disclosure: This post contains affiliate links and I may earn a small commission if you purchase through these links.
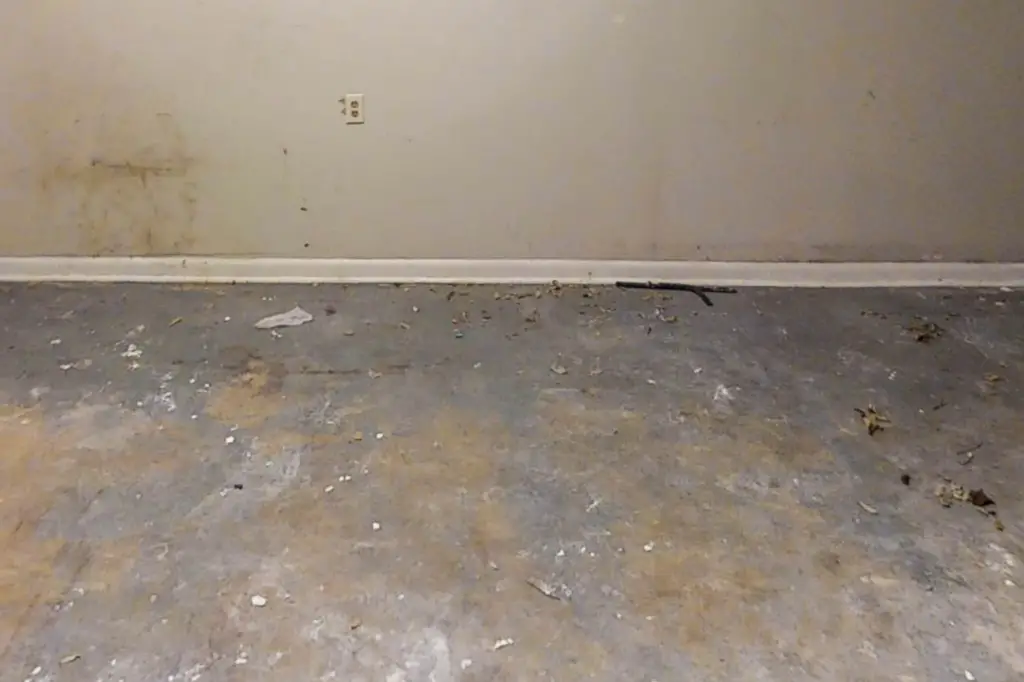
The grip of winter is starting to loosen up, and you notice the season has done a number on your garage floor. Spring-cleaning is in the air, and you have decided to start with your garage floor. The caked-on mud and unsightly stains from the road salt dripping off of your car, need to go asap.
But what’s the best way to tackle road salt residue damages with the least amount of headache?
This tutorial will tell you how to clean your garage floor after winter, remove stains, and do basic repairs to your damaged concrete. I will take you along, step-by-step, on what you need to do to get the best results with the least effort.
What causes the staining and damage?
Rock salt, or a solution of saltwater, is used on main roads and highways as a deicing method. It is used to protect drivers from slippery conditions and prevent ice build-up on the roads. The ice, dirt, and chemicals from the roads get tracked into the garage and melt onto the floor. Once they are on the floor, the slow and steady breakdown begins.
Contrary to popular belief, concrete is porous. These diluted chemicals seep down into the concrete. When temperatures drop, they freeze and expand. This can cause cracking and the breaking off of chunks and flakes, also known as spalling. This salt is a lot like the salt you have in your kitchen cupboard or on your dinner table. It’s the same sodium chloride (NaCl), except it has impurities in it.
On the other hand, when temperatures fall into the single digits other types of salt are added to the rock salt. Common examples of these other chemicals are magnesium chloride and calcium chloride. They help with highways’ longer-lasting ice prevention. The salt chemicals eventually do dry up and evaporate. These leftover powdery crystals leave your garage floor appearing ugly and tired-looking.
So what can you do to get it back in shape?
First things first. To get the garage back into tip-top shape, you can try following some of these specific steps. Once you get yourself organized, you will be able to accomplish this task in no time at all. You will need to:
Clear things out
You will need to clear the entire floor space to see where all the dirt, salt stains, and possible floor damages are. Move your belongings to a covered area, if you have one. Otherwise, you will need to put everything outside. In this case, wait for a day that is rain and snow-free! The things that have been put up safely on shelves don’t need to be removed. Once everything is out and off of the floor, you can take a good look around for a final assessment of your garage floor.
Clean up dust and debris
Now that everything is off the floor, all the debris and dust can be removed. A broom dedicated to outdoor use will be useful at this time.

Time for a deep clean
Give your floors a once-over with a bucket of hot, soapy water and mop. This will help you see what remaining areas are stained and need more focused attention. In addition to removing road salt from your concrete garage floor, you may need to get rid of some other types of stains. You may need to arm yourself with a few extra cleaning recipes. Have a plan of action to tackle any rust, grease, or paint stains that you may find.
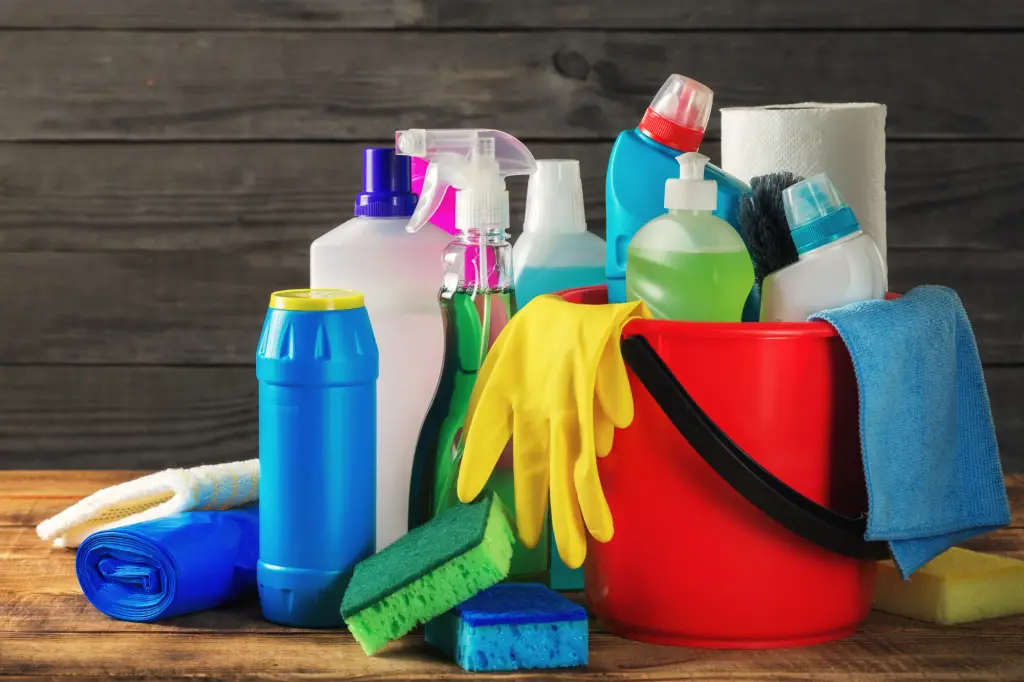
Popular DIY recipes for cleaning the garage floor after winter
Are you concerned about using cleaning products that are toxic to the environment? Or maybe you’re interested in saving money by making your own cleaning concoctions. These 6 ideas can get you closer to that goal of having a squeaky clean garage floor. All that without hurting the environment or spending a ton of money in the process.
1- stain-removing baking soda and dish soap paste
Make a paste with baking soda mixed with some dish soap. You can use this paste for any stains you find on the garage floor. Apply the paste, and scrub it into the stain with a stiff brush. It is important to both rinse and dry the area well so that no salt residue remains on the surface of the garage floor.
2- liquid baking soda all-purpose cleaner
Mix a half-cup of baking soda with a gallon of warm water and use it as an all-purpose cleaner. This solution will get rid of grime and dirt caked onto the garage floor.
3- vinegar and dish soap salt stain remover
To remove salt stains, mix one gallon of warm water, 1 cup of vinegar, and a squirt of dish soap. Apply the solution to the area, and scrub with a stiff brush. It is important to both rinse and dry the area well so that no salt residue remains on the surface of the garage floor. Repeat the process as needed.
4- straight dish soap/liquid laundry soap degreaser
For old, soaked-in grease stains, you can try to apply dish or laundry detergent to the stain, and leave it on for 45 minutes. Then add a little water to the soap, and scrub with a nylon-bristle brush. Then let it sit for 15 minutes and scrub again. Rinse well. This process can be repeated as needed for really old grease stains.
5- lemon juice/white vinegar rust remover
To remove rust marks, soak the stained area in lemon juice or white vinegar. Allow the liquid to sit for around 10-15 minutes. Then scrub with a nylon-bristle brush, and rinse the area with water. Repeat the process as needed on tougher rust stains.
6- TSP paint remover
To remove paint from the garage floor first, scrape away any loose paint with a putty knife. Once you have swept away the debris, mix a solution of TSP and water (according to the directions on the label). Apply this solution, and let it sit for 5 minutes, then scrub. This process can be repeated as needed.
Commercial Concrete Cleaners
The shelves of your local hardware stores are brimming with loads of garage floor cleaning products. Here are 4 popular products that you can consider using for your cleaning mission.
Rustoleum Cleaner and Degreaser- breaks down oil, grease stains, tire marks, and dirt. This makes it a good choice for use as a general cleaning solution and as a surface prep cleaner when painting or sealing the garage floor. It is especially important to remove all grime, dirt, and oil before painting to ensure a good seal and bond.
Act Concrete Cleaner and Degreaser is an eco-friendly garage floor cleaning product. It removes oil, grease, and mildew stains from garage floors. It works by using an enzymatic process to clean and absorb dirt. It breaks down and digests the byproduct that has settled into the floor.
EXIMO Waterless Concrete Cleaner, much like the Act concrete cleaner, is eco-friendly. It uses the process of bioremediation. Bioremediation put simply is where microorganisms digest different types of pollutants. This technique absorbs tough oil and petroleum stains below the concrete’s surface. This leaves you with a deep-cleaned concrete garage floor.
So now your concrete garage floor is gleaming and spotless. The only problem left is noticeable cracks and pitting in a few areas due to salt damage. Don’t be too glum chum, let’s get that fixed!
How do you repair salt damage on your concrete garage floor, and what are your DIY repair options?
The idea of repairing your own garage floor can be a little intimidating at first. But with the right information and follow-through, it can be done easily and effectively. DIY options are also less expensive than paying someone else to repair your floor.
To have the best possible results, you’re going to need to purchase the right concrete floor repair product for the right repair job. You will need to follow these steps:
Assess the damage and choose the right product for it.
When it comes to garage floors, there are generally 3 types of damage that are most commonly in need of repair:
surface cracks
Can be hairline all the way to wide open cracks
pitting
This is when small holes or “pits,” show up on the concrete floor making it look dented
spalling
Is when part of the concrete surface peels, breaks, or flakes away
Though not all options are created equally, there are several when it comes to DIY kits. Lower-priced, water-based or latex-based concrete crack fillers are widely available. If you choose to go with this option, they can be found at just about any of your local Big Box home improvement centers. But these products have their drawbacks. Most people plan on either sealing, painting, or applying an epoxy flooring system after a repair.
This is done as a way to further protect the floor. These types of products are not sandable or paintable and can end up being more trouble than they are worth. This can be a problem if in the future you want to apply a smooth and sleek-looking surface protection element. To make matters worse, over time, these materials tend to shrink and pull away from the repair site.
Installing tile or mat flooring can also be a quick fix option if water seepage isn’t an issue.
The 2 most simple to use, and common types of repair kits available for garage floor repair are 2 part epoxy repair kits and 2 part polymer resin kits.
Epoxy repair kits
Epoxy repair kits are two-part systems. The product typically comes in cans or tubes labeled as A and B. Epoxy is a strong adhesive or glue that does not expand. While curing, epoxy repairs by making a tight bond between itself and the concrete.
Epoxy repair kits you can try
For cracks less than ¼’ wide, you can try a liquid epoxy kit called Simpson Stong-Tie Crack-Pac. This product is designed to protect concrete floors from moisture damage. The resin contained in the cartridge and the hardener contained in the nozzle make it easy to clean and mix. This product is not usually available in stores but can be purchased online.
Another type of epoxy repair kit is called PC-Concrete Epoxy Crack Repair. It contains a thicker element. It requires using a putty knife to work into the crack. It works well for filling small holes and divots in the concrete. It comes with a self-mixing tip. Because it fully cures in 4 hours, it’s possible to repair the garage floor cracks and sand the dried epoxy on the same day. This product is not widely available in stores but can be purchased online.
A third popular product is an epoxy repair kit called Rust-Oleum’s EpoxyShield Concrete Patch. You need to mix the separate Part-A and Part-B materials on a piece of cardboard or wood. This product is a great choice for wider and deeper cracks. This epoxy concrete patch kit is also handy if you have a lot of cracks to repair since it comes in 1-gallon containers or larger. This product can also be found at your local Home Depot making it a little easier to get your hands on it.
Polymer resin kits often use an activator or accelerator. Resin and activator are mixed before they are injected. Polyurethane resins are also available in two-component chemical cure formats. No moisture needed. The crack can be fine or wide or even actively leaking.
Polymer Resin Kits
One available kit is Crackweld. It’s an easy-to-use 2 part polymer resin kit that can be used to repair spalling, holes and pitting. This product flows easily and is perfect for both fine hairline cracks as well as cracks up to ½” wide. It is user-friendly, quick-drying, and can be painted on in as little as 15 minutes.
*Pro-tip: some contractors use duct tape on either side of the crack. This allows for easier clean-up.
Floor protection and maintenance
Now that floors are clean and patched up, you may want to consider some of these options in the future to help protect your investment. Here are 3 options to consider:
1- Epoxy coating hides minor imperfections on the floor and repels stains and spills.
2- Urethane concrete sealers offer high-gloss protection against spills and stains. They also protect against yellowing caused by prolonged exposure to sunlight.
3- Latex sealers give your garage floor a moderate amount of protection. There are a variety of colors to choose from. It is mold and mildew-resistant, water-resistant, and provides for easy cleaning of the garage floor.
Regular cleaning and maintenance of your concrete garage floor is a necessary evil. You will be protecting your investment in the long run.
Following this step-by-step plan will help to take away some of the guesswork. It always helps to have an action plan you can refer to. Once this yearly spring task is complete, you can pat yourself on the shoulder for a job well done!
Further Reading
