Disclosure: This post contains affiliate links and I may earn a small commission if you purchase through these links.
Carpets look nice when they’re brand new but they can easily lose their beauty when they’re dirty and stained.

Unfortunately, the design of carpets makes them a perfect ground to quickly gather dirt, animal hair, as well as stains like coffee and tomato sauce.
Besides aesthetics, this can also attract insects and mites into your house, which causes illness and diseases.
As you can see, quick and regular cleaning is the key to keep your carpet shining. luckily, you don’t have to buy expensive cleaners to get the job done, as you can actually use vinegar for the job!
In today’s article, I’ll walk you through a brief guide on how to clean carpets with vinegar in addition to everything you need to know about the process. So without further ado, let’s dive in!
What Are the Advantages of Using Vinegar to Clean Carpets?
Before diving into the juicy details of cleaning carpets with vinegar, you might be wondering whether it is actually worth the try.
In the following section, you’ll find a list of all the benefits that make cleaning carpets with vinegar one of the most viable options for many people. Let’s check them out!
Highly Versatile and Available Ingredient
While some carpet detergents can cost you a hefty sum, vinegar is easily one of the most affordable ingredients that will get the job of cleaning a carpet done!
Ideally, you can find white vinegar just about anywhere from supermarkets and grocery stores, to chain department stores as well as online.
Since you only need about 2 to 3 cups of vinegar to create a solution that can clean more than one carpet, you won’t have any trouble finding it.
Moreover, white vinegar is super versatile! In addition to cooking, you can use it to clean tons of household items for an excellent bang for your buck!
Safe for Kids and Pets

One of the worst things about cleaning formulas and detergents is that they’re not always safe around kids and pets.
Even if they look harmless, they usually produce some invisible fumes that can irritate your lungs with time.
On the other hand, white vinegar is safe for kids and animals, as we easily consume it in our food.
You won’t have to worry if your pet accidentally licks it too, although you don’t want your pets around the carpet while cleaning anyway.
Keep in mind that humans and animals with breathing problems might not be comfortable around vinegar, but not to the point that a diluted mixture would cause them serious health risks.
Generally Safe to Use on Carpets
Not only will vinegar be a very safe alternative to detergents on carpets, but it’s also usually safe for the fabrics of your carpets.
Unlike highly corrosive cleaning formulas, the acetic acid, which is the main component of white vinegar, is fairly mild towards fabrics of most carpets.
Yet, you still need to make sure that you test the fabric out on a small scale before carrying on with the process, as vinegar might still cause discoloration and shrinkage to some synthetic carpets.
Partially Sanitize Carpets While Cleaning
Although vinegar isn’t a complete sanitizer that will kill all bacteria, it’s still an acid that won’t encourage the growth of bacteria and mold on your carpet.
Using vinegar makes the job of sanitizing shorter and takes less time to be finished, all the while using an ingredient that’s safe for your family.
How to Clean Carpets with Vinegar: A Step By Step Guide
Now that you know how vinegar can be the solution to many of your problems with artificial detergents, it’s time to know how to use it.
If you browse the internet, you’ll find that people use vinegar in a variety of ways to clean carpets. Here’s the method that I’ve found the best results on carpets with!
Step 1: Vacuum the Carpet
Even if you’re all about cleaning your carpet with vinegar, you shouldn’t just start by pouring vinegar solution on the carpet and expect it to work.
In fact, adding any kind of liquid detergent over loose dirt will only make them sink in deeper, leaving them only more difficult to clean.
First, you need to prepare the carpet for the vinegar treatment you’re going to use. This is usually done by removing as much loose dirt, dust, and debris, as possible before using the vinegar.
The ideal way to get that done is by using a vacuum cleaner. Make sure that you clean your carpet in all directions and get rid of dust. Additionally, you should vacuum the front and the back of the carpet for optimal results.
Step 2: Create and Test the Vinegar Solution on the Carpet
With your carpet vacuumed, it’s time to prepare the vinegar solution to clean your carpet. As you already know, vinegar is effective and safe. However, this doesn’t mean that using a concentrated solution on your carpet won’t damage it.
Similarly, too much dilution will probably cause the vinegar to lose its effect and might not clean the carpet well.
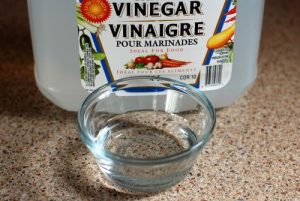
Ideally, you’ll need a bucket, a pan, or a similar container in size. Start by adding 3 to 4 cups of white vinegar to the bucket along with 2 to 3 teaspoons of dish soap. This soap should be colorless and mild, such as Dawn dish soap.
Next, fill up the bucket with warm to barely hot water, which is usually between 7 to 8 liters of water (about 2 gallons).
This solution worked out fine with almost all carpets I’ve used it for. However, you’ll still need to test out the created solution on a tiny or hidden part of the carpet and see how it goes. Only proceed if the solution doesn’t discolor, shrink, or damage the test surface of the carpet.
Step 3: Scrub the Carpet Thoroughly
Some methods suggest using the vinegar solution in a spray bottle to spray it over the carpet and let it sit for 10 to 15 minutes.
However, I’ve found that scrubbing the solution using a brush gives better results, especially with relatively more difficult stains.
Additionally, scrubbing the vinegar will also help in getting rid of bad odors in the carpets and partially sanitize it. So, you can try out both methods for yourself and see which one works best for you.
If you’re going to scrub the carpet, bring a soft carpet brush because fabrics will be more delicate and prone to wear when they’re wet. In fact, soft cloths and non-shedding sponges might also do the trick.
Dip your scrubbing item in the solution bucket and gently scrub the carpet towards the direction of the nap.
Remember to use linear motion and take your time with the carpet, especially if you’re cleaning the entire carpet rather than removing a stain.
This way, you can combine both scrubbings and letting the solution set powers. If the carpet has fringes, you can also clean them in their direction.
Step 4: Rinse the Carpet Carefully
One thing you should know is that rinsing the vinegar once you’re done is as crucial as cleaning it.
When you rinse the carpet with water, you get rid of the residual solution in the carpet. If you skip this step, this residue will leave a large yellowish stain, so you should rinse it carefully.
Ideally, you’d be cleaning the entire carpet. In that case, it’s best to do the rinsing somewhere where you don’t mind the flow of water and getting wet.
If your carpet can handle being thoroughly wet, you can use a water hose or sprayer to rinse it fully with clean water until all the solution is out. Remember to keep the rinsing water relatively cold to protect the carpet fibers.
However, if your carpet doesn’t tolerate too much moisture, you can instead use a new clean cloth, dip it in water and use it to wipe the solution the same way you scrubbed the carpet.
This method is also ideal if you’re only cleaning a small spot of the carpet and don’t want to excessively wet the carpet for it.
Step 5: Get Rid of Excess Moisture
Carpet tissue won’t be able to handle excessive moisture because it might break the pad. Not only that, but the water might also leave a stain and a bit of smell if you don’t dry it up correctly.
For professional cleaning, you’d need a vacuum cleaner that has powerful suction and can work on wet surfaces.
However, if you don’t have such a vacuum, you can simply leave the carpet somewhere where it can dry out quickly.
A pro tip here is to gently squeeze as much moisture out of the carpet as you can. This can be done by using a squeegee, which is the tool you wipe windows with. Simply press the tool along the carpet toward the fringes until it stops getting water out.
This method will easily get rid of the majority of moisture, so it’ll dry quickly without falling apart or smelling bad due to mildew or mold.
Step 6: Let the Carpet Dry Completely
Even if the carpet seems dry, it’ll still have some moisture deep inside, which can be enough to create smelly mold and possible stains.
With most of the moisture eliminated, it’ll be much easier to take it outside to dry in the sun. remember to check on the carpet by gently pressing on it to check if it dried out completely.
If you can’t take it outside, you can dry it out indoors by leaving the windows open and turning on fans. Also, avoid stepping on the carpet until it’s completely dry, which might take up to 24 hours.
What Items to Use With Vinegar to Clean a Carpet?
Here’s a list of all the items that you may mix with vinegar to get better results while cleaning carpets:
Water for Dilution
While most of the items on the list would improve the performance of the vinegar, this one is crucial for the vinegar to be safe for fabrics.
Always make sure that you mix your vinegar with a range of 2 parts water for 1 part vinegar to prevent it from damaging the surfaces.
Steam Cleaners
If you have a steam cleaner that is struggling to remove a hard stain on your carpet, you may add some vinegar to the water tank of the steam cleaner.
Make sure that you don’t add baking soda to the mix because it will clog the steam tubes with time.
Keep in mind that doing this will make the entire room smelling like vinegar for a few minutes, so make sure you have proper ventilation before adding the vinegar.
Soapy Detergents
In my experience, adding a few drops of a mild soapy detergent or dish soap will dramatically improve the results of cleaning with vinegar. It’ll also give you some bubbly froth and mask the smell of vinegar to a little extent.
Essential Oils
If you’re too repulsed from the smell of white vinegar and diluting it yields lesser results, you may want to try adding a few drops of any essential oil you like.
Not only will they mask the funky smell of vinegar efficiently, but they’ll also provide you with a pleasant odor and might even have some soothing and therapeutic effects, such as lavender and chamomile.
What Items to Avoid Mixing with Vinegar While Cleaning a Carpet?
Here’s a list of 3 ingredients that you shouldn’t mix with the vinegar while cleaning a carpet.
Bleach
Bleach is made of a fairly strong acid. However, adding a weak acid to it will release very dangerous and colorless fumes of chlorine gas in the air.
Chlorine reacts with the moisture in the eyes and lungs to cause some very serious chemical burns that may require immediate hospitalization.
Baking Soda
You might be surprised by the number of people that claim that baking soda and vinegar make a good mix. However, they’re only good for science project volcanoes and don’t make a good cleaning mix.
The basic soda reacts with the acidic vinegar to produce a salt that doesn’t have much of the cleaning powers of both items. So, it’s better to use each one of them separately.
Hydrogen Peroxide Solution
Mixing hydrogen peroxide with vinegar produces peracetic acid, which is a strong disinfectant that can be used to disinfect some surfaces.
However, they can be highly corrosive for fabrics used in making carpets, so you should avoid this mix.
What Are the Disadvantages of Using Vinegar to Clean Carpets?
Despite all its merits, like all things, vinegar has some drawbacks that you should be aware of. However, these disadvantages are minimal when compared to the number of benefits they can offer!
Must Be Tested Out First
As you now know, you shouldn’t trust vinegar to be harmless to your carpet until you try it out for yourself.
In some rare cases, vinegar might be too reactive with the carpet and cause shrinkage or discoloration, so you have to test it out first.
Might Not Be Enough for Hard Stains
Vinegar will get the majority of hard stains out. However, it might not be able to eliminate every single stain on your carpet but the majority of them.
Luckily, mixing vinegar with some soapy detergents might help in getting rid of deep greasy stains that vinegar alone won’t remove.
Has a Specific Strong Smell
It goes without saying that vinegar has a pretty strong smell that you won’t like. That’s why you need to keep the room ventilated properly throughout the process of carpet cleanup.
Can You Use Apple Cider Vinegar Instead of White Vinegar for Carpet Cleaning?
As a rule of thumb, cleaning carpets is usually done with white vinegar instead of apple cider vinegar just because it’s more affordable.
However, apple cider packs the same effectiveness as white vinegar. The only difference here is that apple cider might even have a mildew smell than white vinegar.
If you’re planning to use apple cider vinegar, remember to reduce its acidity by diluting it with water and drops of mild and colorless dish soap for best results and avoid damaging the fabric.
Also, make sure that you use apple cider vinegar outdoors because its smell can attract insects and bugs. And of course, we don’t want to replace a problem with another one.
Wrap Up
There you have it. A complete guide that walks you through everything you need to know about cleaning carpets with vinegar.
As you can see, the ingredient has been used as a safe alternative to expensive and corrosive detergents and cleaning agents for years.
In addition to carpets, you can use vinegar, especially white vinegar, to clean a wide variety of stains in different places in your house.
Vinegar is inexpensive, easy to work with, and widely available, so it’s a great item to use without worrying about causing damage to the surface you’re treating.
However, you should always remember to test the vinegar on a tiny spot first before applying it to the entire surface.
Also, remember to give the vinegar enough time to process, so you can achieve the best results possible!
Further Reading