Disclosure: This post contains affiliate links and I may earn a small commission if you purchase through these links.
In today’s busy world, it’s super easy to overlook most of your daily chores. With time, the clutter can pile up into mountains of hoarded stuff that will be too hard to sort out. All of a sudden you get that all-too-familiar pressure in your chest.
I like to remember the famous words of Hans Selye, a renowned endocrinologist who revolutionized the way we perceive stress. He once said, “It’s not our stress that kills us; it’s our reaction to it!”
In this article, I’ll show you how you can alter your reaction toward cleaning by explaining my easy method on how to clean a cluttered house fast. Let’s get going!
1. Establish the Plan
I know what you’re probably thinking. If you want to cut the cleaning time in half, you’d better grab your dusting brush and get to work, right? Well, I wouldn’t do that.
“The [cleaning] speed comes from the method instead of hurrying,” says Debbie Sardone, a cleaning specialist who owns several maid services.
When you start by laying out a plan, the cleaning process won’t seem that overwhelming. Plus, working with a clear plan will make it a lot easier to pause and resume later, in case something urgent comes up.
Clean Top to Bottom, Left to Right
Do you know why cleaning seems so tiring? It’s all about the approach.
Let’s say you’re cleaning the living room. You should start by dusting the ceiling fan, cleaning the blinds, dusting the walls, and so forth. Then, and only then, can you move on to other tasks at a lower level, such as wiping the skirting and vacuuming the floor.
If you clean in the opposite direction, the dirt will fall down on what you’ve just cleaned, forcing you into a vicious circle that will aimlessly devour your time.
Similarly, you have to specify a horizontal cleaning direction. Personally, I like to move from left to right. This way, you’ll focus your energy to clean one spot at a time instead of darting back and forth around the room.
The Three Basic Cycles
As you’ll see later on, most rooms can be cleaned via three cycles.
First, you should start with decluttering. In this step, you’ll put away anything blocking access to the actual parts of your room. This can be trash, laundry, things that don’t belong in this room, and so forth.
Then, you can begin dusting and wiping every bit inside your room. In the bathroom and kitchen, this will require a bit of elbow grease to remove all the buildup and grime. But in bedrooms and living rooms, this won’t be as tough.
The last cycle involves vacuuming, mopping, and taking care of any remaining task from the previous cycles — like loading the washing machine, taking out the trash, replacing your personal stuff, etc.
Consider Delegating Some Tasks
If you’re surrounded by intimidating piles of clutter, chances are you don’t live alone. Whether you have roommates or a family, you shouldn’t be cleaning alone, especially if you want to do it as fast as possible.
Plus, asking your kids to help in these chores will not only teach them to be responsible, but it’ll also consume their pent-up energy, which should be extremely helpful in the current homeschooling situation.
2. Conquering the Bathroom
With all of its grime, scum, and clutter, bathrooms are definitely the most intimidating room to clean. Don’t let it hang over your head for too long! Let’s take care of it.
Step 1: Declutter
To facilitate the following steps, I like to start by removing anything lying around the bathroom. This includes the various products you place over your counter, shower, and bathtub. You should also remove all the used towels, rugs, plus the stuff piled up in your trash cans.
Step 2: Vacuum
Get your vacuum cleaner, and start by vacuuming your light fixtures and your window casings. Make sure to extend your arms high enough to pick up cobwebs and whatnot. Then, walk your way down until you reach the floor. Pay special attention to the small corners that you’d often overlook. These will have the highest amount of lurking dirt and fallen hair.
Step 3: Apply the Cleaners
Now that everything is out of the way, spray an all-purpose cleaner over your shower/bathtub, toilet seat, and sink. Let the solution sit for the manufacturer’s recommended time while you execute the following steps.
If you haven’t cleaned your bathroom in a long time, you might want to use a powerful acid-based cleaner to remove the stubborn build-up with minimal effort.
Pro tip: Before using any chemicals, make sure to properly ventilate your bathroom because the produced fumes can severely irritate your lungs.
Step 4: Clean the Vanity Area
While waiting for the chemicals to sizzle away the grime, grab a microfiber cloth and wipe your vanity mirror from top to bottom with an all-purpose cleaner. You can use a polishing cloth afterward to quickly absorb any remaining moisture. With the clean side of the microfiber cloth, wipe the countertop and polish the fixtures.
Step 5: Unclog the Air Vents
The highly humid bathroom environment will inadvertently clog the air vent. It’s crucial to clean it at least once a month to keep your bathroom feeling fresh.
Use a step ladder to reach the air vent, and remove the cover by sliding it downwards, preferably with a screwdriver. Disconnect your vent fan, and carefully wipe the area with a damp microfiber cloth to remove all the buildup.
Step 6: Get Back to the Challenging Areas
By now, the cleaning solution must have dissolved all the grime off of your sink and shower. Use a clean sponge to rinse away the chemicals and remaining buildup.
Now head off to the toilet seat and scrub the insides with a toilet brush. Afterward, wipe the external surfaces with a clean microfiber cloth.
Step 7: Finish by Mopping the Floor
Once everything gets shiny, you can wipe the floor with a suitable mop.
After the floor dries, restock the towels and place a clean rug. And don’t forget to return all the bathroom products back to their original places.
Bonus: A Golden Tip to Facilitate Future Cleaning
Olivia, one of my best friends, spent the last summer in Japan with her husband’s family. When she got back, she told me that her mother-in-law wipes their sinks and bathtubs every single day!
At first, I thought this is way too tiresome. But with time, I found out that this method removes all the buildup while still soft, which cuts down the overall cleaning time in half.
3. Cleaning the Kitchen
Dealing with spills and dirty dishes isn’t the most pleasant task, but it’s always possible to save time by knowing where to start. Let’s see!
Step 1: Put Away Your Clean Dishes
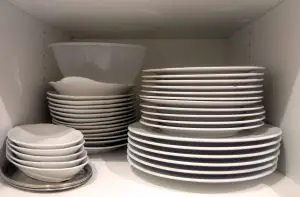
If you have clean dishes sitting in your dishwasher or above a drying rack, quickly store them in your cabinet to make space for the dirty dishes.
Step 2: Take Care of the Dirty Dishes
Scrape off your dirty dishes into the garbage disposal unit or a trash can. Then, soak these dishes in hot, soapy water inside the disposal-free side of your sink, and let them sit until you finish the following steps.
Make sure to keep the disposal side free at all times to quickly discard any leftovers while you work.
Step 3: Clean the Trash and Remove the Clutter
While holding a large garbage bag, walk around your kitchen and collect empty packages, food bits, dirty disposables, and any other trash. And of course, holding the trash bag is way more convenient than darting back and forth to your trash bin.
As you proceed with this step, you’ll probably bump into items that don’t belong in the kitchen — never pause your cleaning session to put away those items since this wastes tremendous time. If your significant other is available, ask them to help with this task.
Step 4: Put Away the Food Packages
Return your food containers and packages back to the pantry, cabinets, and drawers. I like to pack several items together in a basket to put them away in bulk and save time.
Pro tip: When storing your items, don’t give in to the temptation of rearranging the whole pantry, cabinets, or drawers. Not only will this gallop extra time, but you may also need to store additional items in the following steps, which might ruin your meticulous arrangement.
Step 5: Load the Dishwasher
By now, the hot water must have dissolved most of the grease, meaning that you can load your dishes in the dishwasher.
If you don’t own a dishwasher, consider asking your family or roommates to help doing the dishes. You can form a tiny assembly line by having a person to wash, another one to rinse, and the last one to dry and put away.
Step 6: Wipe and Dust
Use an all-purpose cleaner with a microfiber cloth to wipe your countertop, dining table, sink, fixtures, stovetop, and other appliances.
If you haven’t cleaned in a long time, you may want to deep clean your oven, microwave, fridge, and dishwasher.
Lastly, don’t forget to dust the sides of the cabinets and walls to remove any lurking cobwebs.
Step 7: Finish by Mopping the Floor
Now that you’ve cleaned all the nooks and crannies inside your kitchen, all you have to do is mop the floor with a suitable all-purpose cleaner.
If you need a new mop, check out my curated lists for the 7 best mops for vinyl floors and the 15 top picks for laminate kitchens.
4. Tidying Up the Remaining Rooms
Whether it’s a living room, bedroom, kids room, or even a dorm room, the cleaning method is pretty similar. I’ll explain my general method for all these rooms, but I’ll quickly refer to anything special about any particular rooms whenever needed.
Step 1: Declutter and Pick Up the Trash
Before you can get to the actual dusting and vacuuming, you should clear the way by removing any clutter or trash.
To start, prepare two laundry baskets and two plastic bags, and place them in the center of the room. You’ll use the first basket for collecting stuff that doesn’t belong in the room, the second basket for dirty clothes, and the two plastic bags for recyclable and non-recyclable trash.
Now, as I said in the “Planning” section, you’ll need to pick the clutter from left to right. Don’t allow yourself to dwell too much on this step, though. Each item you pick should go in its respective basket or bag in a matter of seconds. Once you collect all the stuff, you can worry about sorting them out when you have enough time to spare.
What About Clean Clothes?
If you have separate piles of clean clothes lying around your bedroom, don’t put them away in the dresser or the closet right away. This will waste lots of time because it breaks your cleaning mindset and disrupts your momentum.
Alternatively, you should throw every piece of clothing you find onto the bed. After you complete the decluttering cycle, head off to that pile and fold or hang your clothes in bulk.
Step 2: Dust and Wipe All Surfaces
In the same left-to-right circle you used in the previous step, use a duster to clean the ceiling and walls. You can also use a vacuum cleaner if you have the necessary attachments. If you have a ceiling fan, take your time to carefully clean the main unit and all the blades. Don’t worry if any dust falls onto your furniture; we’ll take care of that later.
Now wet a microfiber cloth with your favorite all-purpose cleaner, and go in the same circle to wipe everything with a hard surface — tables, lampshades, light fixtures, wooden furniture, TVs, bookshelves, and so forth.
Step 3: Make the Bed
If you haven’t changed your bed sheets in a while, throw them in the laundry basket. After placing the new sheets, quickly flatten any bumps and place your pillows in a sightly manner.
Pro tip: To cut down on the amount of cleaning you have to do in the future, always make your bed first thing in the morning. Why? Well, having a neat bed is the most helpful way to fight the cluttering temptation. If your sheets are messed up and your blanket is hideously curled, your mind will find it pretty harmless to throw an extra layer of clutter.
Step 4: Tidy Up Your Furniture
Having movie marathons is a fun way to kill some time, but it inadvertently leaves a terrible mess.
For a quick cleaning cycle, grab your vacuum cleaner, attach the upholstery head, and make your way through the cushions, pillows, and other soft surfaces.
Will that clean deeply enough? That’s highly doubtful. For the best results, consider getting an upholstery steam cleaner.
Thanks to its high temperature, steam will kill most of the bacteria infesting your living area. Also, the pressure will reach deep inside your furniture, collecting the most stubborn dirt.
After finishing, arrange the pillows back in position after fluffing them up. You might also want to flip them to hide those ugly indents.
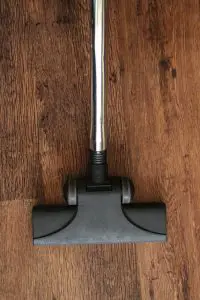
Step 5: Vacuum
When it’s time to vacuum carpets, it’s better not to rush yourself, even if you’re short on time. Your vacuum needs time to effectively pick up all the dirt and food bits hidden deep inside the pile.
After activating your vacuum’s brush roll, start from one of your carpet’s bottom corners. Slowly push the vacuum forwards, and slowly bring it back to you — that’s the first row.
For the next row, shift the vacuum to the side to cover about 25% of the first row. This overlap is important because some vacuums tend to push dirt to the side, which ends up overlooked between the rows, leaving you with unsightly streaks.
If your current vacuum is acting up, don’t waste any of your precious time with it. Check out my detailed buying guide of the 10 best vacuums for carpets.
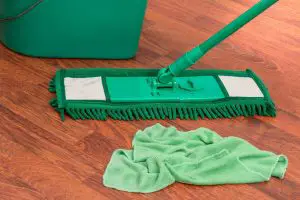
Step 6: Mop the Non-Carpeted Areas
If your bare floor still looks dirty after vacuuming, go get your mop. You can use a microfiber model, but I think it won’t cut it. For the fastest results, use an old-school rag mob.
To start, wet your mob with your favorite floor cleaner, and quickly slide it over your floor. Don’t try to scrape anything, though.
After about five minutes, the cleaner will have loosened up all the dirt and sticky goo. All you have to do now is rinse with clean water.
That’s All, Folks!
Phew! That was quite a journey, wasn’t it?
Remember, if you want to cut down the future cleaning time, the only effective way is to clean more often — probably once every two weeks. Yes, it might be hard to schedule these frequent cleaning sessions, but it’ll make your home feel fresher for a longer time before you need major cleaning.
Later!
Further Reading